Instructions
This should work with OSX and Windows on VMWare Fuison and WMWare Workstation.
This guide has been tested with WMWare Fusion 8 on OS X 10.11.5 and macOS Sierra 10.12 Public Beta 1 as guest OS.
Overview
- Requirements
- The problem
- Generating Values
- Serial
- MAC Adress
- MLB + ROM
- GO!
1. Requirements
You will need a genuine OSX Copy, freshly installed.
It will NOT work with OS X distros like Niresh or Yosemite.Zone.
Also you will need Clover Configurator on your guest OS.
2. The problem
VMWare does not generate a serial-number and MLB/ROM values which are sopisticated enough. Your About this Mac will look something like this.
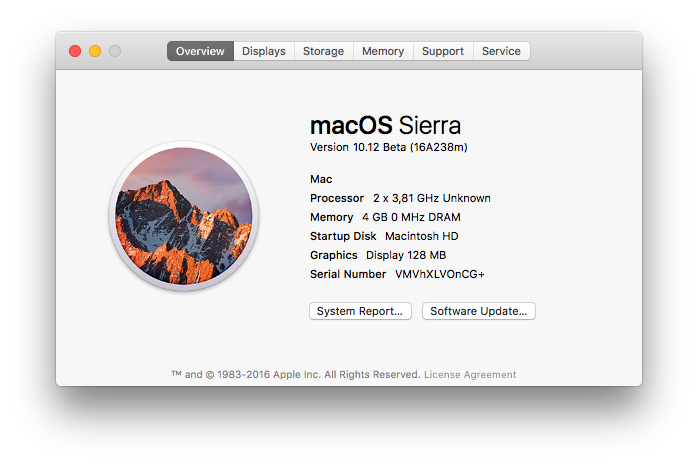
Notice the VM at the start of the serial-number ? We will fix that and more with this guide.
3. Generating values
3.1. Serial-number and more.
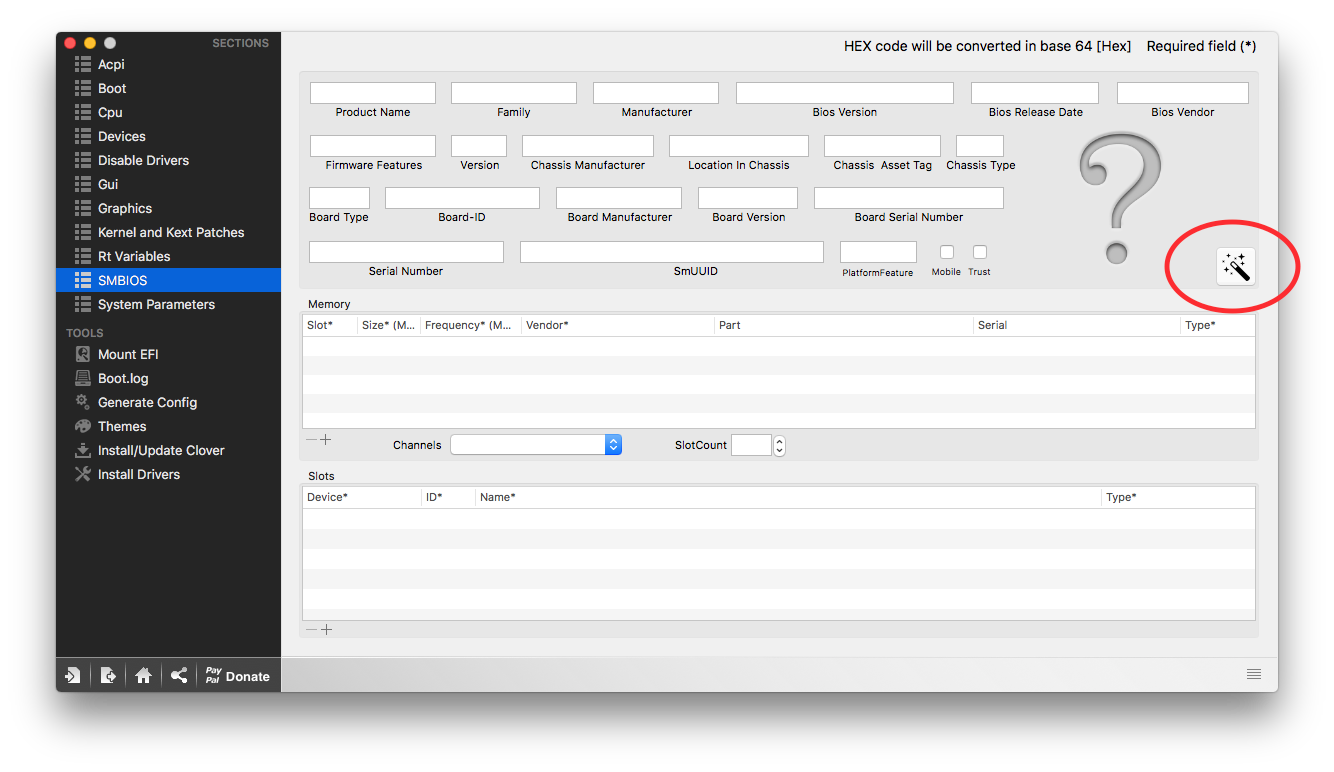
Open Clover Configurator and dismiss any Pop-Up telling you about a missing EFI partiton or config.plist, we don’t need it.
Navigate to the SMBIOS section and click on the „Magic Wand“
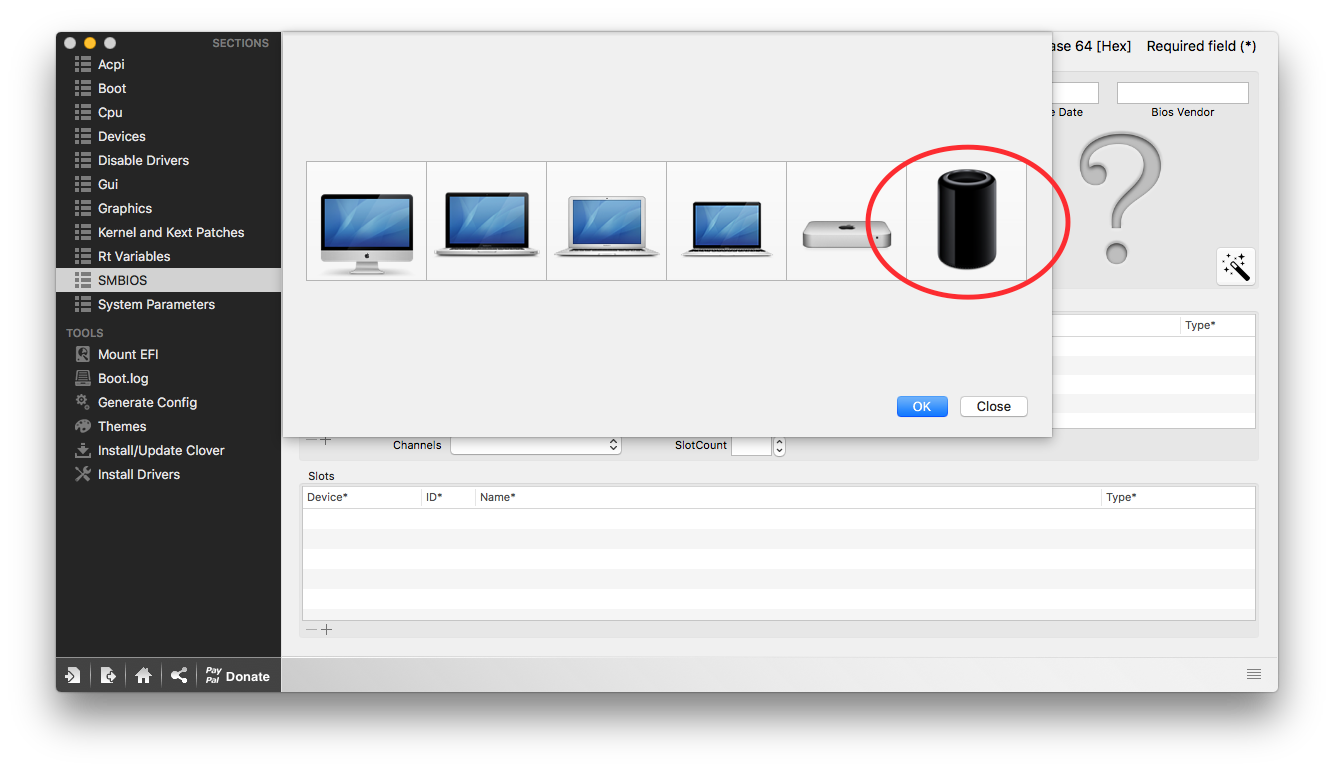
You should be presented with this. Choose the new Mac Pro model and hit OK.
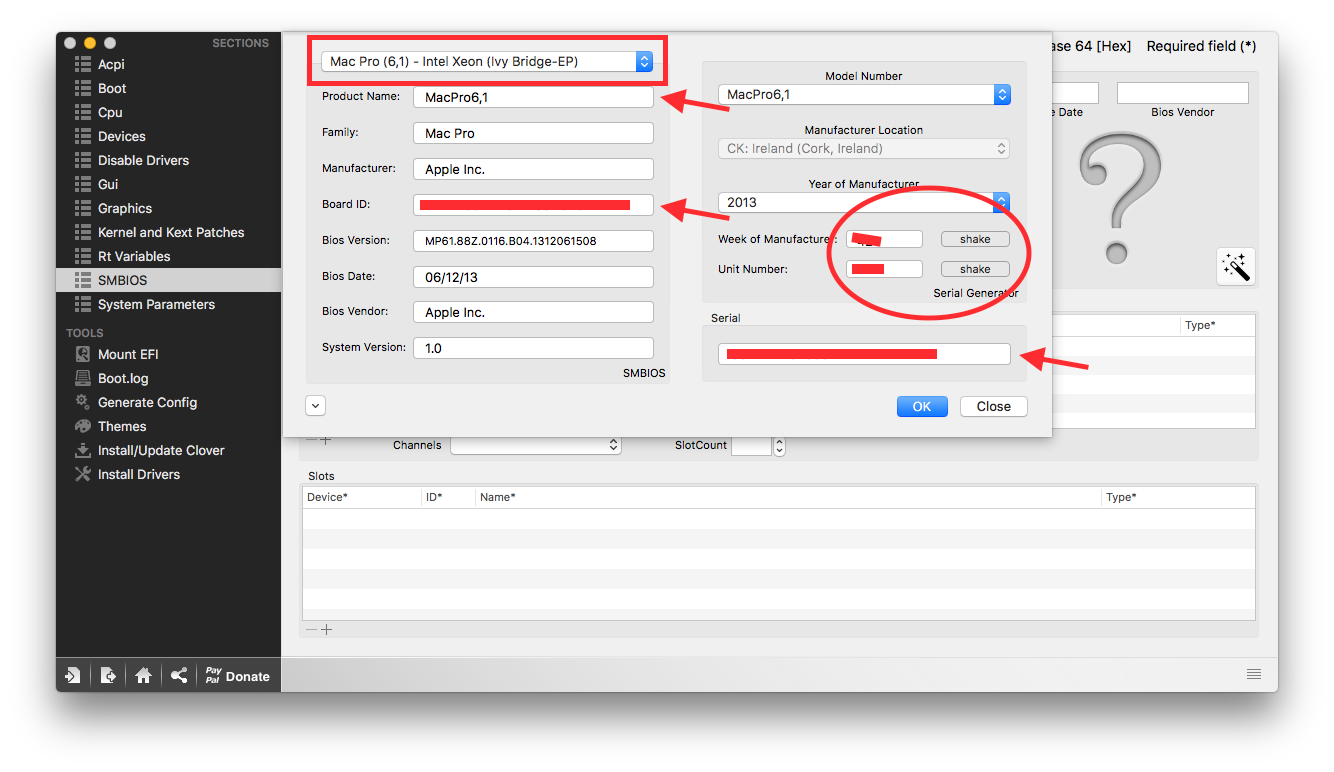
Choose Mac Pro 6,1 in the drop-down list (1). And randomize your serial-number (2). Then write down the information (3).
Save the config.plist, shut down your OS X VM and search for the .vmx file in at the VM location. Open it with your favourite text editor and search for the following and change it to „FALSE“.
board-id.reflectHost = "TRUE"
And add flowing lines to the .vmx file
board-id = "AAA"
hw.model.reflectHost = "FALSE"
hw.model = "BBB"
serialNumber.reflectHost = "FALSE"
serialNumber = "CCC"
smbios.reflectHost = "FALSE"
Replace AAA with the board-id, BBB with the hardware model and CCC with the serial-number previously generated.
Keep it open for the next step
3.2. MAC-Address
We also need to change the MAC address of our VM. For this remove the following from your .vmx.
ethernet0.addressType = "generated"
ethernet0.generatedAddress = "xx:xx:xx:xx:xx:xx"
ethernet0.generatedAddressOffset = "0"
Then add this and change the DDD with a MAC (Unix) adress from here.
ethernet0.addressType = "static"
ethernet0.Address = "DDD"
ethernet0.checkMACAddress = "false"
Save your work and restart the VM.
3.3 ROM + MLB
Open the Terminal on your guest and run
uuidgen
It will give you an unique number as output.
Open the previosuly saved config.plist in Clover Configurator and navigate to the SMBIOS section. And copy the output to the SmUUID field.
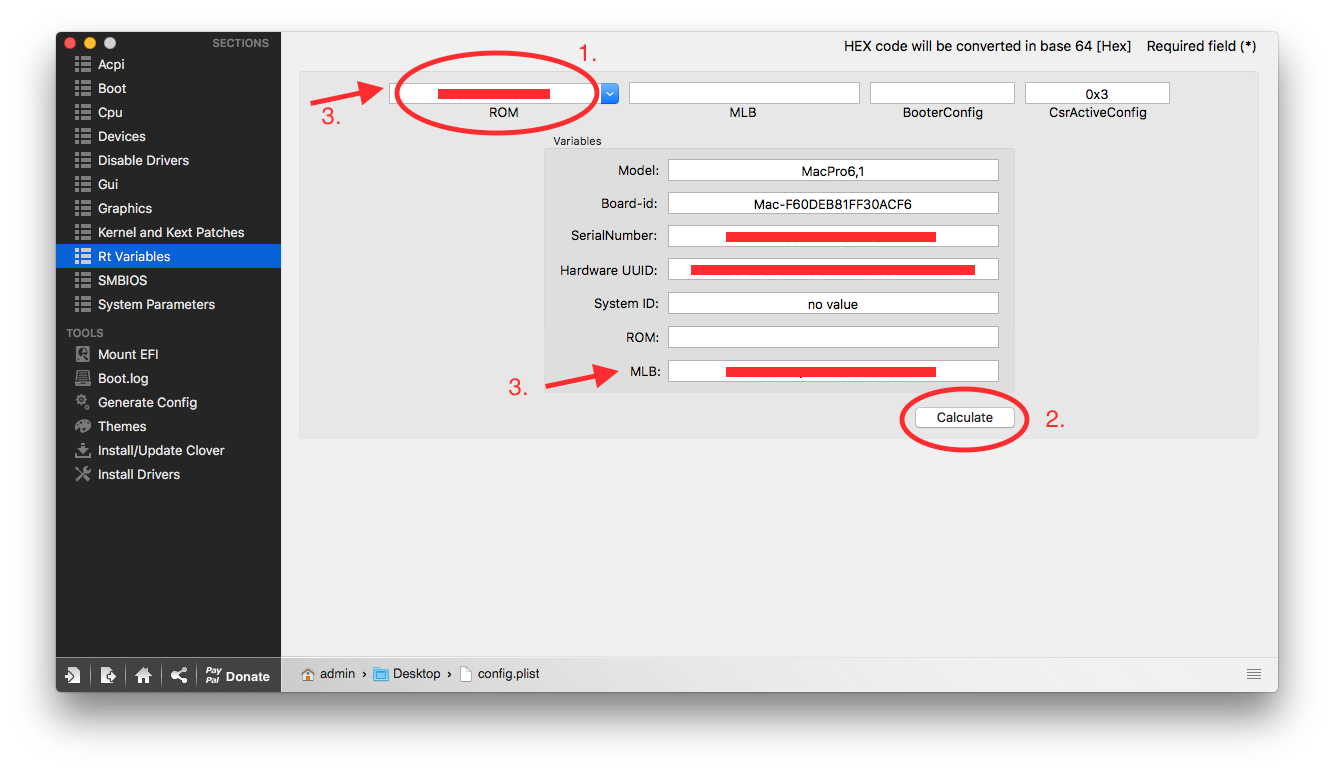
Go to the Rt Variables section and copy the last 12 (Hex) values from the uuidgen output to the ROM field (1). Save and hit calculate (2). Note the MLB and the ROM (from before) for further use (3).
Shutdown the VM and open the .vmx file again.
Add following to the .vmx file.
efi.nvram.var.ROM.reflectHost = "FALSE"
efi.nvram.var.MLB.reflectHost = "FALSE"
efi.nvram.var.ROM = "EEE"
efi.nvram.var.MLB = "FFF"
Replace EEE with the ROM value and FFF with the MLB value, save and start your VM again.
4. GO!
Login with your AppleID in iMessage. You should be good to go.
BUT i can’t guarantee that this will work forever! Apple changes the requirements every so often, rendering some actions usless to the point it simply doesn’t work.